Monday, July 30, 2012

Chicken Pie/ Shortcrust Pastry

Pin It Now!

I'm glad I manage to take part in another bake-along which hosted by Zoe of Bake for Happy Kids, Joyce of Kitchen Flavours and Lena of Frozen Wings. This time is chicken pie. I actually bake this pie and serve my family as weekend lunch. As we all know pie taste better while freshly bake out from oven. Therefore I just make four medium pies for four of us.
 
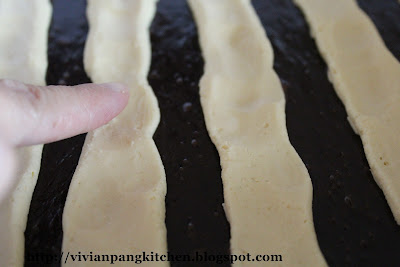
The base is not crispy!
I'm using Zoe pastry recipe as the quantity is just enough for my four foils. As usual my pie base turned out wet and not crispy. I understand for this kind of pie we do not practice 'blind bake' (bake the pastry first before adding filling). Some will brush the base with egg white first before adding filling. I did brush the base but the result still the same...wet :( Anyone have any tips on how to get crispy base? I hope with some tips from you guys I can have my crispy base pies next time :D


Make 4 x 12cm diameter pies
Ingredients:
Adapted from Bake for Happy Kids with some changes
~ Pastry
(A)
150g unsalted butter, chilled, cut into cubes
300g plain flour
1/8 teaspoon salt
 
(B)
7ml vinegar
85ml water, chilled
 
~Filling
(A)
2-3 tablespoons vegetable oil
250g chicken thigh fillets, cut into cubes
1 medium onion, diced
1 small carrot, diced
1 medium potato, diced
 
(B)
1 tablespoon oyster sauce
1 tablespoon light soya sauce
1 tablespoon cooking wine
Some water
Some pepper and salt
 
(C) cornflour mixture
1 teaspoon cornflour
1 tablespoon water
*dissolve and set aside
 
 
Methods:
~Pastry
1. Remove butter from the refrigerator for 5-10 minutes before start mixing (butter should be just soft but still very cold).
 
2. Mix flour and salt in a large bowl. Add in cubed butter. Use fingertips to rub butter into flour until fine breadcrumbs.
 
3. Combine the vinegar with the chilled water and pour over the flour mixture. Fold the mixture with a spatula to combine.
 
4. Turn out the floury mix onto working surface and gather the mix together with hand.
 
5. Divide into two even sized portions and shape into two round disc about 2 cm thick. Wrap each disc in plastic wrap and refrigerate for at least 2 hours or overnight.
 

~Filling
1. Heat up a pan. Add in oil. Put in the diced chicken and cook till pale. Add in diced vegetables and cook for few minutes.
 
2. Add in oyster sauce, soya and wine and stir for few times before adding water. Amount of water about cover the vegetables. Bring to boil. Cover and turn to lower heat, cook till all the vegetables turn soft. Add salt and pepper according to your taste.
 
3. Lastly add in the cornflour mixture to thicken the filling. Leave to cool.


~ Making pie
1. Remove pastry from refrigerator few minutes before used. Gently roll the pastry out about 5 mm thick (I roll the pastry between cling wraps. This is a lot easy to roll and transfer without the problem of sticking on board or rolling pin).


2. With the guide of aluminium foil cut out the disc with pizza cutter. Transfer them to base of foil. Lightly press to the sides. Proceed with the other three. Prick the base with fork and ready for filling.

3. For the pie lids, roll out the remaining pastry into about 3mm thick (between cling wraps). With the guide of aluminium foil cut out into four discs.

4. Spoon the chicken mixture into the pie, filling them to the brim.

5. Cover with the pastry lid. With a fork gently press the edge in order to make good seal. Make some cuts on the surface to help release steam out during the baking process. Brush the top of the pie with egg wash.

6. Bake in preheated oven at 180C for 30 minutes or until golden brown. Place the pie on wire rack for few minutes before serving.

I am sharing this recipe at :

Made with Love Mondays hosted by Javelin Warrior's Cookin w/ Luv

JWsMadeWLuvMondays


Muhibbah Malaysia Monday hosted by Suresh of 3 Hungry Tummies


Bake-Along # 29 hosted by Bake for Happy Kids, Kitchen Flavours and Frozen Wings


Saturday, July 28, 2012

Dates Scone

Pin It Now!

These scones are actually inspired by scones from Zoe, Bake for Happy Kids and Kitchen Flavours. It is part of my mission to use out old stuffs too :D Dates has been sitting in my fridge almost a year! And a little wholemeal (not sure why and when l left it?) These are just perfect for these dates scones.  


Some flour is being sprinkle on top therefore these scone are quite pale once baked. How to check are they done? Check by looking at the scone base. It is cook through once the bottom is evenly brown.


Ingredients:
2 cups all-purpose flour, plus 1 tablespoon extra for coating (chilled)
1/2 tablespoon baking powder
1/2 tablespoon cream of tartar
15g wholemeal
25g sugar
1/4 teaspoon salt
100g cold unsalted butter, cut into chunks
100g pitted dates
* cut into small pieces and coat with the 1 tablespoon flour. Set aside.
120ml milk
 
 
Methods:
1. In a large bowl, sift all dry ingredients together. Rub in the butter until the mixture resembles fine crumbs.  Add in coated dates and mix well.
 
2. Add in milk into dry ingredients then fold to form the dough into soft ball. Lightly knead everything together and place on floured working surface. Shape the dough into long rectangle, flattening the top to form a thickness about 4-5 cm.
 
3. Cut the dough into fat little triangles with floured knife. Sit the scones closely on a prepared baking tray and dust them with a little extra flour.
 
4. Bake in preheated oven 220C for 15-18 minutes or till brown. Remove and cool on wire rack. It is best to serve warm.


I'm sharing this recipe with a link to Lavender and Lovage and What Kate Baked for Tea Time Treats for July.


Have a nice weekend!


Wednesday, July 25, 2012

Avocado Mexican Salsa with Crispy Chicken

Pin It Now!

Before I go to today recipe I like to talk about Avocados From Mexico. They are the World’s Finest! Grown in the volcanic soil of Michoacán, their avocado trees bloom year round – the only place in the world that this is true. Originally grown in Mexico, centuries ago, years of expert cultivation have produced the creamy delicious taste people love. Avocados From Mexico are versatile and always delicious in everything from salads to smoothies. They’re great for cooking and baking too!


For more information about Avocados From Mexico visit this website.

Avocados From Mexico


Today Avocados From Mexico has Recipes from Avocado Lovers section on their website. The new recipes section will give amateur cooks and foodies who love avocados, the opportunity to upload their favorite avocado recipes, download ringtones, wallpapers and other fun items to show their avocado love and discover other fan favorite avocado recipes. Do visit their link, Recipes from Avocado Lovers for fabulous avocado recipes!


This salsa is great side dish with meat. Sometimes I like to enjoy it with my homemade chicken nuggets. But today I serve it with crispy chicken fillet. I hope you will like it.


Ingredients:
~crispy chicken
1 chicken breast
2-3 tablespoons flour
1 egg (slightly beaten)
1/2 cup breadcrumb
Vegetable oil for frying


~avocado salsa
2 medium diced tomatoes
1/2 diced medium sized onion
half a cucumber, peeled and diced
1 avocado, peeled and diced
2 jalapenos/ chilies (or more if you prefer it hotter)
About 1/4 bunch of cilantro
1-2 tablespoons lemon / lime juice
1/2 teaspoon of minced garlic
1 tsp of salt


Methods:
~crispy chicken
1. Cut the chicken breast thinly. Coat with flour, egg and lastly breadcrumb. Repeat the same till all finish.

2. Heat up a pan. Pour in oil. Arrange the coated chicken and cook at medium low heat till cooked and golden brown. Dish out and place on kitchen towel to drain excess oil.


~avocado salsa
1. Wash and dice all the vegetables.

2. Put all ingredients in a bowl.

3. Add salt, garlic and lemon juice. Mix them up. Chill if you preferred.


Serve and enjoy!

Disclosure: This is part of a sponsored campaign with The Foodie Blogroll and Avocado From Mexico.

Monday, July 23, 2012

Black Sesame Marble Cheesecake(Gluten Free)

Pin It Now!

This heavy cheesecake is well received by my family. I really like the combination of black sesame and cream cheese. The nutty taste of the seeds and the creaminess of the cheese really go well. I definitely will bake again.


I grind the black sesame seeds instead using the powder form. Therefore the black marble not so fine, black spots everywhere :D Besides creating marble I also added the black sesame inside the base.

This cheesecake is gluten free as I used all corn flour. Feel free to replace with all-purpose or cake flour for not gluten free version. They are equally good :) Hope you will try it!


Reference from Carol Marble Cheesecake
Ingredients: ~ Base
12 pieces cream crackers
1 tbsp sugar
15g ground black sesame
50g melted butter

~ Cake
(A)
400g cream cheese
20g butter
20g castor sugar

3 yolks
30g milk
1 tbsp vanilla extract
15g corn flour


(B)
3 whites
1/2 tsp lemon juice (or vinegar)
60g castor sugar


(C) Pattern
3 tbsp batter
10g ground black sesame
 
Methods:
~ Base
Blend the cream cracker and sugar into fine crumbs. Add in the ground black sesame. Mix well. Add in the melted butter. Spread evenly on the spring foam pan. Chill to set.

~ Cake
1. Beat the cream cheese, butter and sugar till smooth.

2. Add in egg yolk, milk, vanilla extract and flour in sequence. Make sure the mixture is well mix before adding the next ingredient.

3. In other clean bowl, beat the egg white till foamy. Add in lemon juice and half of sugar. Continue beat till glossy. Add in the rest of sugar and beat till soft peak.


4. Spoon 1/3 of the white mixture into the cream cheese batter. Gently fold to combine. Pour all the cheese mixture into the egg whites. Fold until well combined.

5. Remove 1 tablespoon of batter into a bowl and mix well with ground black sesame seeds. Once well mixed add 2-3 more tablespoons of batter. Fold gently till well combine. Adding by two batches will get well mixed batter without deflate the egg whites too much. Set aside.


6. Pour the main batter into prepared pan. With a spoon scatter the black batter on the surface. Creating marble by running a chopstick or knife by swirling the black batter like a snake, S shape and not in straight lines.

7. Steam baked or bake in water bath at 150C for about 25 minutes. Turn the temperature to 120C and bake further 30 minutes.
* Do adjust your oven accordingly.
* I used steam baked method. I place the hot water pan in the lower rack and the spring foam pan at the middle rack. Therefore not need to worry about the water sipping inside my cake. Save wrapping too. Do find out here how I place my pan.

8. After the baking time is over, slightly open the oven door and let the cake cool completely inside the oven. Once cool. Keep in fridge for several hours or overnight.


9. After chilled run a small knife around the cake edges then remove from cake mould. Cut the cheesecake with thin blade. In order to get nice cut heat the blade on stove before slice the cake.
* I pour some hot water on the blade and wipe dry with kitchen towel. This works well too.
* Make sure wipe the blade after each cut. Then heat it again.

I shared this recipe at  

Summer Fairs & Fêtes and Cake Stall Cakes & Bakes, July’s Tea Time Treats Challenge hosted by Lavender and Lovage and What Kate Baked


Friday, July 20, 2012

Summer Rolls Vietnamese Style

Pin It Now!

Sometimes I like to have light meals. Vietnamese spring rolls are one of my choices. This rice paper roll is commonly use in Vietnamese cuisine. They are made from white rice flour, tapioca flour, salt, and water. It is usually sold dried in thin, crisp, translucent round sheets that are wrapped in cellophane. The sheets are dipped briefly in warm water to soften them, then wrapped around savory or sweet ingredients.


The 1st times I 'know' this rice paper roll via TV cooking show. After knowing how easy it was to prepare Vietnamese spring roll I told myself I should try out. I'm glad I did. It is very refreshing meal with lots of vegetables inside the rolls. Having Vietnamese rolls not complete without the sweet sour dipping sauce. I would say the sauce is pretty much vary according to personal taste. As long as the sauce has the sweet, sour and spicy component you are almost there of having the right sauce. You will definitely satisfy of having these Vietnamese spring rolls with your own personal taste of sauce.


Ingredients:
~ Filling
Carrot
Cucumber
Tomato
Coriander (or any herbs like basil, mint etc.)
*I didn’t weight the vegetables. Do use any quantity you like.

Some cooked chicken breast (shredded)

One packet of vermicelli (50g)

~ Sweet sour sauce
2 tsp sugar
2 tsp good quality vinegar
1 tbsp lime juice (or lemon juice)
1 tsp chilies sauce
1 fresh chili padi (diced thinly)
Pinch of salt
*mix all and stir to dissolve. Set aside.

Few rice paper rolls for wrapping (about 6 sheets)

A shallow bowl of warm water to soften the rice paper roll

Methods:
1. Thinly slice all the vegetables. Set aside.

2. Soak the vermicelli about 5 minutes. Bring a pot of water to boil. Cook it until transparent. Dish out, drain and put in a container to cool. Make few cuts on the vermicelli with a pair of scissors.

3. Begin wrap by soften a piece of rice paper roll in the warm water. Immediately place on the working board. Start arrange the filling with vermicelli first then the rest of vegetables and shredded chicken on top.
*Place the ingredients that you like to “show” on the top.

4. Wrap by folding towards center then the sides. Roll up till the end. Repeat the same for the rest.

5. Serve with the sauce and enjoy!

Some cool gadgets from Amazon that you might need :)


I'm sending this post to

1. Recipe Box Linky # 6 - Thanks for Lunch  hosted by Bizzy Bakes
Recipe Box


JWsMadeWLuvMondays


Tuesday, July 17, 2012

Japanese Cotton Marble Cheesecake

Pin It Now!
Before chill
It has been quite sometimes I bake Japanese cotton cheesecake. This time I created some marble pattern with some cocoa powder.


Since I'm baking for this month Aspiring Bakers with the theme gluten-free bakes, I used rice flour instead. The result is still as great as ordinary cake or all-purpose flour.


I’m submitting this post to
Recipe Box


3. Summer Fairs & Fêtes and Cake Stall Cakes & Bakes, July’s Tea Time Treats Challenge hosted by Lavender and Lovage and What Kate Baked


Adapted and slightly modified from The Batter Baker
Ingredients:
(A)
130g cream cheese
45ml milk
20g butter
3 egg yolks
1 tsp vanilla extract

30g rice flour (can replace with cake or all-purpose flour)
10g corn flour

(B)
3 egg whites
70g caster sugar
1 tsp lemon juice (can replace with 1/2 tsp vinegar)

(C) chocolate batter
1 tbsp cocoa powder
1 tbsp hot water
* dissolve and set aside

Methods:
1. Place cream cheese, milk and butter in a bowl. Cook with double boiler method until thick and smooth. Set aside.


2. After the cheese mixture turned warm, add in yolks and vanilla extract. Whisk to combine.
* make sure the mixture is not too hot till cook the yolks.


3. Sift in both rice and corn flour into the cheese mixture and whisk until well combine.

4. In another clean bowl, beat egg whites until frothy. Put in lemon juice and add in sugar gradually, beat until soft peaks.

5. Scoop about 1/3 of egg whites into cheese mixture and fold to combine. Pour the mixed batter into whites. Again fold and make sure all the egg whites are well combined with the cheese mixture.

6. For the cocoa batter remove 3-4 tablespoons of batter into the cocoa mixture. Mix well and set aside.

7. Pour the plain batter into 8” round pan with lined base and sides. Pour the cocoa batter on top. Then create the swirls with a chopstick.
* for better swirls swirl the chocolate batter like a snake, S shape and not in straight lines.


8. Place cake pan into a slightly bigger, shallower pan. Fill the bigger pan with boiling water and put in oven to bake at 150C for 20 minutes. Then turn down to 120C and further bake for 20-25 minutes.
*Oven temperature only for your reference do adjust according to your oven.


9. Unmould cake immediately upon removal from oven, if not the cake will shrink a lot.
* Don't worry of handling soft cotton cheesecake. If the cheesecake is well cooked you won't have the problem of removing the cake. It is not fragile that you think :)


10. Once cool keep the cake in fridge to chill before serving.


Do support and shop at my blog. You might need these. Happy shopping!


Saturday, July 14, 2012

Not So Checkerboard Brownies

Pin It Now!

This cake actually inspired by checker layer cake brought back by my son from his friends. I find that is special as it has crispy bits from the top. I know I want to bake something like that but still thinking what type of cake I should bake. Until I saw Zoe from Bake for Happy Kids and fellow bloggers bake checkerboard brownies. Immediately I know what I want to bake :D
 
Have you try this? This is the one I tried.
I used cookies dough instead of cream cheese for the checkerboard effect. Too bad mine not really looks like checkerboard. I only realised when I thinking how to cut my cake :P
 

Actually this is the 2nd batch of my brownies. For the 1st batch my cookies dough portion is not enough. Therefore it ends up thin lines between brownies batter. I double up the cookies dough ingredients and this time enough to draw 'board'. Too bad still can’t get my checkerboard brownies correctly. Checkerboard or not the brownies still taste great. My kids love it. I hope you don't mine trying my not so checkerboard brownies :D

1st batch of brownies
 
Ingredients:
~Brownies
(A)
85g unsalted butter
115g semisweet chocolate, chopped
 
(B)
60g brown sugar
2 large eggs, at room temperature
 
(C)
70g all-purpose flour
1 tablespoon unsweetened cocoa powder
1/2 teaspoon baking powder
1/8 teaspoon salt
1 teaspoon vanilla extract
 
 
~ cookies dough
(A)
120g butter, at room temperature
 
(B)
1 tsp vanilla extract
35g icing sugar
 
100g all-purpose flour
 
 
Methods:
~ brownies
1. Preheat oven to 180°C/350°F. Line 8 inch square baking tray with greaseproof paper.
 
2. In a bowl, melt chocolate and butter together via double boiler method. Stir until smooth. Remove from heat.
 
3. Add in the sugar then the eggs. Whisk in flour, cocoa powder, baking powder, vanilla extract and salt. Whisk to combine.
 
4. Pour the brownies batter into pan. Layer the batter evenly at all the edges. Keep in fridge to set (about 15 minutes). Meanwhile prepare the cookies dough for topping.
 
~ Cookies dough
1. Cream butter in mixer till fluffy. Sift icing sugar over butter, slightly fold to mix. Again beat with mixer till combine.
 
2. Add in flour and vanilla extract. Fold till well incorporate with spatula.
 
3. Divide the dough into 2 parts. Transfer the soft dough into 2 piping bag (I used plastic bag, about 125g each).
 
~ Assemble


1. Remove the brownies batter from fridge. Pipe lines on the brownies surface to create criss-cross pattern. Flatten by pressing the piped lines with wet finger.
* wet your finger with some water before touching the soft dough.


after piping from 1st bag

flatten with wet finger

ready for oven

2. Bake in preheated oven at 180C for 22-25 minutes. Check with cake tester. It is done when the skewer comes out clean. By that time the cookies batter should turn light golden brown.


3. Allow the brownies rest in the pan for few minutes then transfer out and place on wire rack to cool completely. Cut and enjoy!


I'm sending this post to
1. Bake-Along #28 hosted by Zoe from Bake for Happy Kids


Photobucket


2. Recipe Box # 5 hosted by Bizzy Bakes


Recipe Box


3. Summer Fairs & Fêtes and Cake Stall Cakes & Bakes, July’s Tea Time Treats Challenge hosted by Lavender and Lovage and What Kate Baked


Related Posts Plugin for WordPress, Blogger...