

Recently,
I used to prepare steamed bun (mantou) as snack for my little girl. She not
keen to drink water therefore I try to avoid giving her baked goods. Another
option will be steamed cake. Thanks to Aspiring Bakers for having steamed cake
as this month theme. Now I have lots of choice to choose from fellow blogger
friends.
Since my girl is only 14th months old I try to serve her as 'healthy' as I can. This recipe actually is very simple. It is similar to making muffin, mixing wet ingredients with dry. Then steam straight away! Since I'm adding vegetable, extra effort are needed to prepare the vegetable. Therefore here come the long steps :P

Reference
from steamed cake Anna blog
Yield 7 tea cups
Ingredients:
(A)
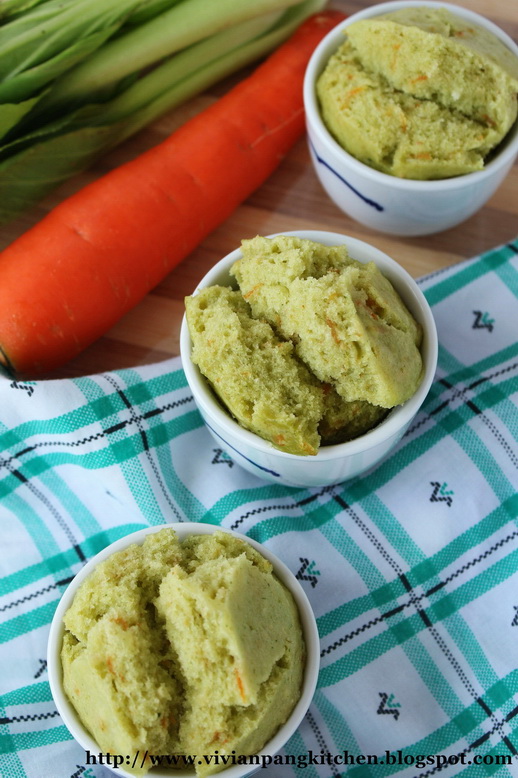
50g bok choy (小白菜)
*spinach will be nice too
30g carrot
250g water (water from blanching vegetable)
* add water if not enough
90g sugar
1 tbsp vegetable oil
(B)
250g self-raising flour
1/2 tsp baking powder
pinch of salt
1 tbsp wheat germ(optional)
Methods:
1. Grate carrot finely. Set aside.
Yield 7 tea cups
Ingredients:
(A)
50g bok choy (小白菜)
*spinach will be nice too
30g carrot
250g water (water from blanching vegetable)
* add water if not enough
90g sugar
1 tbsp vegetable oil
(B)
250g self-raising flour
1/2 tsp baking powder
pinch of salt
1 tbsp wheat germ(optional)
Methods:
1. Grate carrot finely. Set aside.
2. Bring some water to boil. Add in washed bok choy and blanch for 1-2 minutes. Remove, drain and leave to cool. Reserve the water. Measure the reserved water to get 250ml. Top up if needed.
3. Put the blanched bok choy into blender. Scoop some liquid from the 250ml water into blender. Blend till fine. Pour back into remain liquid and become 'green' liquid.
4. Add sugar into 'green' liquid. Stir till sugar melt. Add in grated carrot and vegetable oil. Whisk to combine.
5. In a mixing bowl, sieve in flour, baking powder and salt. Add in wheat germ and stir to mix.
6. If you are using tea cup like mine, lightly grease the cups with oil. Arrange the cups into steamer and bring the water to rapid boil.
* In order to get better result do get the steamer ready before prepare the batter. Once done immediately send into steamer without any delay.
* I heated the coated tea cups before used. This can help easy removal after cooked.
7. Once steamer is about ready, prepare the batter. Make a well in the center of dry ingredients. Pour in the 'green' liquid mixture. Whisk to combine. The mixture should be thick as shown.

I am submitting this to Aspiring Bakers #25 – Steaming Hot Cakes (November 2012) hosted by Miss B of Everybody Eats Well in Flanders


