Wednesday, December 30, 2015

Chocolate Mousse Cake (Mousse without Egg)

Pin It Now!


This chocolate mousse cake is similar with early post. For this version I would say is easier as no egg is added. But the only problem is the cake can’t stay at room temperature for too long as the mousse filling and topping are easy to melt. Nevertheless the cake is great! Is great for special occasion :)

Thursday, December 26, 2013

Alternative Log Cake

Pin It Now!

Last year I made Christmas Log Cake. This year I want to make something different for Very Good Recipes challenge. As we know log cake is made with sponge cake, frosted, rolled to form a cylinder, and frosted again on the outside. Mine is frosted on the outside but without sponge cake inside. Can you guess what could it be ?

Tuesday, October 23, 2012

Banana Muffins with Cocoa Custard Cream Topping

Pin It Now!

I like to prepare muffin as it is quick. It is consider healthy as most of the muffin recipes call for fruits. Banana muffin is one of my favourite.

I was attracted by Quay Po Banana Chocolate Cupcakes. It looks so tempting with those topping. Instead of using ordinary buttercream frosting I used custard cream. 
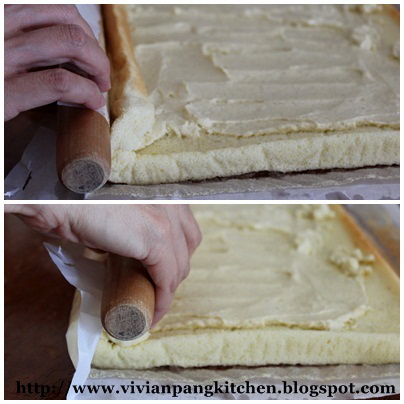
Custard cream actually is not meant for topping. It is a bit runny and can't hold its’ shape for long especially at room temperature. It is normally used as filling in Swiss roll. Since I want something healthy I don't mind to have runny topping. Therefore no cups of icing sugar added which needed for stiff frosting.

Sprinkle some colourful candies to please my kids ^^
How about you? Do you mine to have some of my muffins with runny frosting? :D


Adapted from Quay Po Cooks, Banana Chocolate Cupcakes and modified according to my liking
~Banana cocoa muffins
Ingredients:
(A)
130g all-purpose flour
40g unsweetened cocoa powder
1 tsp baking powder
1/4 baking soda
1/4 teaspoon salt
140g sugar
 
(B)
1 egg
200g mashed ripe bananas
180g warm water
60g vegetable oil
1 tsp vanilla extract
 
 
Methods: yields 12-13 regular-sized muffin cups
1. Sift mixture of flour, cocoa powder, baking powder, baking soda, and salt into a bowl. Add in sugar and whisk to combine.
2. In another bowl, whisk egg, mashed banana, water, oil and vanilla extract until well combined.
3. Add the wet ingredients to the dry ingredients. Stir or whisk until combine.
4. Scoop the batter into the cupcakes liner to 3/4 full. Bake in preheated oven 190C for about 20 minutes.
5. Remove from oven and let cool on a wire rack.
 
The muffins are tasty just like that! However no harm to top them with some cream ^^ Let see how to prepare the cocoa custard cream.
 
~Cocoa custard cream topping
(more than enough for 13 pieces cupcakes)
Ingredients:
1 cup milk
 
1 egg, well beaten
60g sugar
10g cocoa powder
10g corn flour
pinch salt
 
50g butter, soften
 
Methods:
1. Warm milk in a bain-marie till tiny bubbles appear around the edges of the pan. 
 
2. Mix together egg, sugar, cocoa powder, corn flour and salt in a bowl and whisk well. Slowly add into milk, stirring constantly until thicken.
 
3. Remove from heat. Cover with cling wrap and put in the fridge for later use. Make sure the cling wrap just touching the custard so it doesn't form a skin.
 
4. With an electric mixer beat the butter until smooth and creamy. Add half the chilled custard. Beat well before adding the second half. It is done once all well combine.
 
5.  Again cover with cling wrap and put in the fridge for later use.
 
~Assemble
Put the chilled cream into piping bag with nozzle of your choice. Pipe out the cream on top of muffins. Enjoy!

I'm sharing this post at:

~Muhibbah Malaysian Monday hosted by 3 hungry tummies


Thursday, October 18, 2012

Hokkaido Pumpkin Chiffon Cupcake with Pumpkin Custard Cream Filling

Pin It Now!
 
Have you try Hokkaido pumpkin chiffon cupcake? How about stuff with pumpkin custard cream? I have this idea after seeing pumpkin chiffon cake in Sonia house. Pumpkin cupcake can't go wrong with pumpkin custard cream as filling right?


Adapted and slightly modified from Nasi Lemak Lover
Ingredients: yields 11 pieces cupcake
(A)
4 egg yolks
20g sugar
50g corn oil
75g pumpkin puree (steamed pumpkin and process till fine)
10g water

50g cake flour
20g rice flour
*sift and set aside

(B)
4 egg whites

1/4 tsp vinegar(or lemon juice)
40g sugar


Methods:
1. Whisk yolks and castor sugar till well combine. Add in oil, pumpkin puree and water. Mix well.

2. Add in the sifted flour and whisk to combine.

3. In other bowl beat the whites till foamy. Add in 1/2 the castor sugar and vinegar. Continue beat till glossy. Add in the rest of castor sugar and beat till soft peak.

4. Spoon 1/3 of the whites into yolks batter. Fold to combine. Pour the yolk mixture into the remaining whites bowl. Fold till well combine.

5. Scoop batter into paper liners to slightly more than 3/4 cup full. Bake in preheated oven 170C for about 22 - 25 minutes (depending on the size).

6. When done, remove from the baking tray and cool it on rack.
*the cake will shrink a bit after being remove from the oven.

I used to prepare custard cream after finish baking. However you can always cook in advance and keep the cream in fridge to set before used.
 
~Custard pumpkin cream filling (more than enough for 11 pieces cupcakes)
Reference from Quay Po Cooks custard cream
Ingredients:
2 cups milk

2 eggs, well beaten
75g sugar
100g pumpkin puree
1/2 cup flour
pinch of salt

Methods:
1. Cook milk in a bain-marie till you see a light froth around the edges of the pan, where tiny bubbles will form. To prevent scorching, be sure to stir the milk as it heats.

2. Mix together eggs, sugar, pumpkin, flour and salt in a bowl and whisk well. Slowly add into milk and stir constantly until thickened.

3. Remove from heat. Cover with cling wrap and put in the fridge for later use. Make sure the cling wrap just touching the custard so it doesn't form a skin.
 
~Assemble
Scoop the chill custard cream into piping bag with big nozzle. Insert the nozzle into the cool cupcake and pipe out the cream as filling. Decorate the topping of cake with little cream. Finish off with other topping that you like. Keep inside fridge for few hours before serve. Enjoy!

Thanks to Doreen for her lovely paper liners!
I'm sharing this post at:

~Recipe Box 19 hosted by Bizzy Bakes

~My Sweet and Savory hosted by Chaya Selig


Saturday, October 6, 2012

Hokkaido Chocolate Chiffon Cupcake with Custard Cream Filling

Pin It Now!
 
Among many types of cake, chiffon cake is not my cup of tea :P But this Hokkaido chiffon cupcake is exception! I kind of like it. The filling that make this cupcake special! Furthermore I stuff this Hokkaido cupcake with custard cream filling. As you know it is mainly made from milk and egg :D

This time I use Quay Po house custard cream filling. It is really great! Instead of using only yolks this recipe calls for whole egg. Some flour is added to thicken the cream. Therefore this custard cream is a lot easy to prepare. Some orange rind is added to give fresh aroma to this custard cream. Due to less yolk (eggs) and present of orange rinds produce custard cream with less no eggy smell. For those who dislike eggy smell in custard cream this one sure you need to try.
 
Adapted and slightly modified from Cruisine Paradise
~yields 8 pieces cupcakes
Ingredients:
~Cupcakes
(A)
3 egg yolks
20g castor sugar
35ml corn oil
50ml milk
1/2 teaspoon vanilla extract

60g cake flour
10g rice flour
5g cocoa powder
*sift and set aside

(B)
3 egg whites
25g castor sugar


Methods:
1. Whisk yolks and castor sugar till well combine. Add in oil, milk and vanilla extract. Mix well.

2. Add in the sifted flour and whisk to combine.

3. In other bowl beat the whites till foamy. Add in 1/2 the castor sugar and vinegar. Continue beat till glossy. Add in the rest of castor sugar and beat till soft peak.

4. Spoon 1/3 of the stiff whites into yolks batter. Fold to combine. Pour the yolk mixture into the remaining whites bowl. Fold till well combine.

5. Scoop batter into paper liners to slightly more than 3/4 cup full. Bake in preheated oven 170C for about 22 - 25 minutes (depending on the size).

6. When done, remove from the baking tray and cool it on rack.
*the cake will shrink a bit after being remove from the oven.


I used to prepare custard cream after finish baking. However you can always cook in advance and keep the cream in fridge to set before used.
 
~Custard cream filling (I made half of the recipe. Just enough for 8 pieces cupcakes)
Adapted and slightly modified from Quay Po Cooks (drop by her blog for full recipe)
Ingredients:
1 cup milk

1 egg, well beaten
40g sugar
1/4 cup flour
pinch salt

1/2 vanilla pod
1 grated orange rind

Methods:
1. Scrape the vanilla seeds from the pod and set aside. Throw the pods into the milk and cook in a bain-marie till you see a light froth around the edges of the pan, where tiny bubbles will form. To prevent scorching, be sure to stir the milk as it heats.

2. Mix together egg, sugar, flour and salt in a bowl and whisk well. Add slowly to milk, stirring constantly until thickened.

3. Remove from heat and add in the vanilla seeds and orange rind. Mix well, let cool and cover with cling wrap and put in the fridge for later use. Make sure the cling wrap just touching the custard so it doesn't form a skin.


~Assemble
Scoop the chill custard cream into piping bag with big nozzle. Insert the nozzle into the cool cupcake and pipe out the cream as filling. Decorate the topping of cake with little cream. Finish off with other topping that you like. Keep inside fridge for few hours before serve. Enjoy!


I'm sharing this post at:

~Recipe Box 17 hosted by Bizzy Bakes


Sunday, September 23, 2012

Red Bean Filling

Pin It Now!

After read mung bean filling from Christine's Recipes I keen to try. Instead of mung bean I used red bean. Although I used to make own red bean filling, it is not good as mooncake filling.

I used to blend my cooked beans and it ends up quite a lot liquid. It takes longer time to reduce the moisture. This time I discard excess water and press through fine sieve to get smooth purée.

In her recipe, wheat starch is used. I found that it not only helps on getting smooth filling it also reduce the splitting during the cooking process. Therefore no need to worry of 'volcano' popping out from hot red bean filling :D

I'm glad I made it! I would say it is my best red bean filling recipe I ever make. Maybe it is too late for your mooncake filling. But you can make this red bean filling for steamed buns and bread too.


Reference from Christine's Recipes, mung bean filling
Yield about 1.5kg
Ingredients:
600g red beans
2 tbsp salt (for soaking beans)
220g caster sugar
120ml vegetable oil
3½ tbsp wheat flour

Methods:
1. Rinse red beans well. Add 2 tablespoons salt into water and soak the beans at least 2 hours.


2. Drain away the salt water. Put the beans into a container. Fill with fresh water and make sure the beans are fully covered. Keep in freezer for overnight.
*I learnt this trick from a Taiwanese cooking show. This can help the process of getting nice soft texture (绵细) beans. This method also can be used in soaking peanuts, black beans etc.

3. The next day, remove the beans from freezer and put into pressure cooker (no need to defrost). Cover the beans with water (about double of the beans weight). Cook for 5 minutes.
*do adjust accordingly. The red beans should be easy to be smashed with finger tips after cooked.


4. Drain beans out and discard excess water. Use a large spoon to press through a fine sieve. You’ll get very smooth red bean puree.


5. Transfer the puree into a heavy bottom wok (or pot). Add sugar and oil. Combine well. Cook over medium high heat until moisture is reduced by two-thirds. Sift in wheat flour in batches and stir to combine well between each addition. Reduce heat to low and simmer until thickened, stirring constantly, about 15 to 20 minutes.


6. Transfer into a large bowl and let it cool down completely. You can make red bean filling one or two days ahead. Wrap it in plastic film and store in fridge.
* The cool red bean filling will become curdle. Just knead the filling for few times and it will get back smooth again. Divide into required portions. Then shape into balls before wrap.

The filling is not too dry or not too wet. The texture should be like smooth dough, easily pulled away from pan.


Wednesday, August 29, 2012

Vanilla Swiss Roll with Vanilla Crème Mousseline

Pin It Now!
 
 
Recently I have less or no time sitting in front of my computer. My little girl hardly takes her morning and even afternoon nap! If happen it will be short one. After settle her down I need to rush for daily house works and preparing meals.  
 
She won't sit still if I'm working on my posts with the computer. She will crawl to me and want to sit on my lap. Then, her little fingers will try to reach keyboard or mouse. It is impossible for me to do my typing with her >.< That's the reason less posting lately... Hope she will get back to her routine nap so I can have my own time.


It has been quite sometimes I baked swiss roll. Quite numbers of readers asking how I roll my swiss roll. This time with the help of my hubby I manage to provide pictures on the rolling process. Hope it is good enough to show steps on rolling.


As for the filling I used vanilla crème mousseline which is basically custard + butter cream. At first prepare the custard which made from eggs, milk, sugar and flour (or cornflour). The mixture is cooked till smooth and creamy before adding to butter cream. I used only half of the cream for my swiss roll. You might use all if you like.

Reference from Carol and 孟老師的美味蛋糕 cookbook
Ingredients:
~Swiss roll
(A)
4 yolks
20g castor sugar
30g vegetable oil
40g milk
60g cake flour
20g rice flour

(B)
4 whites
1 tsp vinegar (or lemon juice)
50g castor sugar


~Filling: Vanilla Crème Mousseline
40g egg yolk (from 2 eggs)
40g sugar
20g low protein flour
200g milk
1 vanilla pod
100g butter


Methods:
~Vanilla Crème Mousseline filling
 
1. Add yolks and sugar in a bowl. Whisk till well combine. Add in cake flour. Stir to well incorporate. Pour in milk and stir to well combine.
 
2. With a sharp knife spilt vanilla pod into two. Slowly run blade over the pod to get the seeds. Add the seeds together with pod into milk mixture.
 

cooking with double boiler method
 
Make sure cover with cling film if chill in fridge
 
3. Cook the milk mixture on stove at low flame. Do whisk constantly while heating up the mixture. The custard is ready once the mixture turns thick (obvious lines appear on mixture surface as you stir). Discard the pod and leave aside to cool.
 
 
4. While waiting for the custard to cool down, beat butter till light and creamy. Add in the cool custard in 2-3 batches. The filling is ready to be used once all combined.
* You can save the cream inside fridge. Do whisk again to soften the cream to achieve spreading consistency.


~Swiss roll
1. Whisk yolks and castor sugar till well combine. Add in vegetable oil and mix well.

2. Whisk in the sifted flour and milk in 2 batches alternatively.

3. In other bowl beat the whites till foamy. Add in 1/2 the castor sugar and vinegar. Continue beat till glossy. Add in the rest of castor sugar. Beat till stiff form.

4. Spoon 1/3 of the stiff whites into yolks batter. Fold to combine. Pour the yolk mixture into the remaining whites bowl. Fold till well combine.

5. Pour the batter into lined and greased swiss roll pan (I'm using 30cm x 36cm). Smooth the surface with scraper. Give the pan some tap to remove big bubbles.

6. Bake in preheated oven at 180C for 15 minutes. Turn the heat to 200C and bake further 3 minutes.
* I'm using steam bake method. Bake by placing a pan with hot water at the bottom of oven.
* I bake further with higher temperature to get brown darker surface. Do adjust according to your oven temperature.

7. Once cooked, transfer the cake by lifting the baking paper (edges) to wire rack. Leave to cool (about 5 minutes).

8. Invert the cake and gently remove the baking paper. With a knife cut 2 lines (at the beginning of rolling point) but the cake is still attached to each other. Spread the filling evenly on the surface. Leave 1-2cm remain unspread.

9. Hold the cake with both hands with the help of rolling pin and roll gently. When the swiss roll is rolled up, make sure the ending portion facing downward. Keep the roll in the refrigerator at least 30 minutes before cut and serve.

 
This is how I roll wiss roll. After removing the baking paper from the cake reuse it for rolling as well. Recycle ^^  


Make sure the end is facing down while chilling in fridge


Related Posts Plugin for WordPress, Blogger...